This tutorial we installing cPanel server with cPGuard plugin. First need fresh minimal install of CentOS.
Installation Requirements
- Minimum of 1 GB RAM (but 2 GB recommended).
- At least 20GB of free disk space (but 40 GB recommended).
- A valid cPanel license.
- Standard hostname (FQDN or Fully Qualified Domain Name)
- Perl
Please note:
Once you have installed cPanel/WHM, it can’t be removed from your system. There is no uninstall script, you will have to reinstall your the operating system to remove it.
Install cPanel to CentOS 7.x
#cd /home && curl -o latest -L https://securedownloads.cpanel.net/latest && sh latest
This may take long time, depend your server CPU/RAM and HDD/SSD speed …
Verifying archive integrity... All good.
Uncompressing cPanel & WHM Installer......
        ____                  _
    ___|  _ \ __ _ _ __   ___| |
   / __| |_) / _` | '_ \ / _ \ |
  | (__|  __/ (_| | | | |  __/ |
   \___|_|   \__,_|_| |_|\___|_|

  Installer Version v00075 rec6efa17c911081813187c22246fb4d710cdaa13

Installing perl...
Loaded plugins: fastestmirror
Loading mirror speeds from cached hostfile
 * base: mirror.checkdomain.de
 * extras: centosmirror.netcup.net
 * updates: mirror.wiuwiu.de
Resolving Dependencies
--> Running transaction check
.
.
.
After installation finished:
2018-09-25 07:18:10  268 ( INFO): cPanel install finished in 20 minutes and 21 seconds!
2018-09-25 07:18:10 1195 ( INFO): Congratulations! Your installation of cPanel & WHM 11.74 is now complete. The next step is to configure your server.
2018-09-25 07:18:10 1195 ( INFO):
2018-09-25 07:18:10 1195 ( INFO): Before you configure your server, ensure that your firewall allows access on port 2087.
2018-09-25 07:18:10 1195 ( INFO): On RHEL, CentOS, and CloudLinux systems, execute /scripts/configure_firewall_for_cpanel to accomplish this.
2018-09-25 07:18:10 1195 ( INFO):
2018-09-25 07:18:10 1195 ( INFO): After ensuring that your firewall allows access on port 2087, you can configure your server.
2018-09-25 07:18:10 1195 ( INFO):
2018-09-25 07:18:10 1195 ( INFO): 1. Open your preferred browser
2018-09-25 07:18:10 1195 ( INFO):
2018-09-25 07:18:10 1195 ( INFO): 2. Type https://127.0.0.1:2087 in the address bar
2018-09-25 07:18:10 1195 ( INFO):
2018-09-25 07:18:10 1195 ( INFO): 3. Enter the word root in the Username text box
2018-09-25 07:18:10 1195 ( INFO):
2018-09-25 07:18:10 1195 ( INFO): 4. Enter your root password in the Password text box
2018-09-25 07:18:10 1195 ( INFO):
2018-09-25 07:18:10 1195 ( INFO): 5. Click the Login button
2018-09-25 07:18:10 1195 ( INFO):
2018-09-25 07:18:10 1195 ( INFO): Visit https://go.cpanel.net/whminit for more information about first-time configuration of your server.
2018-09-25 07:18:10 1195 ( INFO):
2018-09-25 07:18:10 1195 ( INFO): Visit http://support.cpanel.net or https://go.cpanel.net/whmfaq for additional support
2018-09-25 07:18:10 1195 ( INFO):
2018-09-25 07:18:10 1195 ( INFO): Thank you for installing cPanel & WHM 11.74!
Finnish cPanel installation
After that you need to complete the installation wizard from its web based interface. You got this information when installation finished.
Step 1 – Agreement
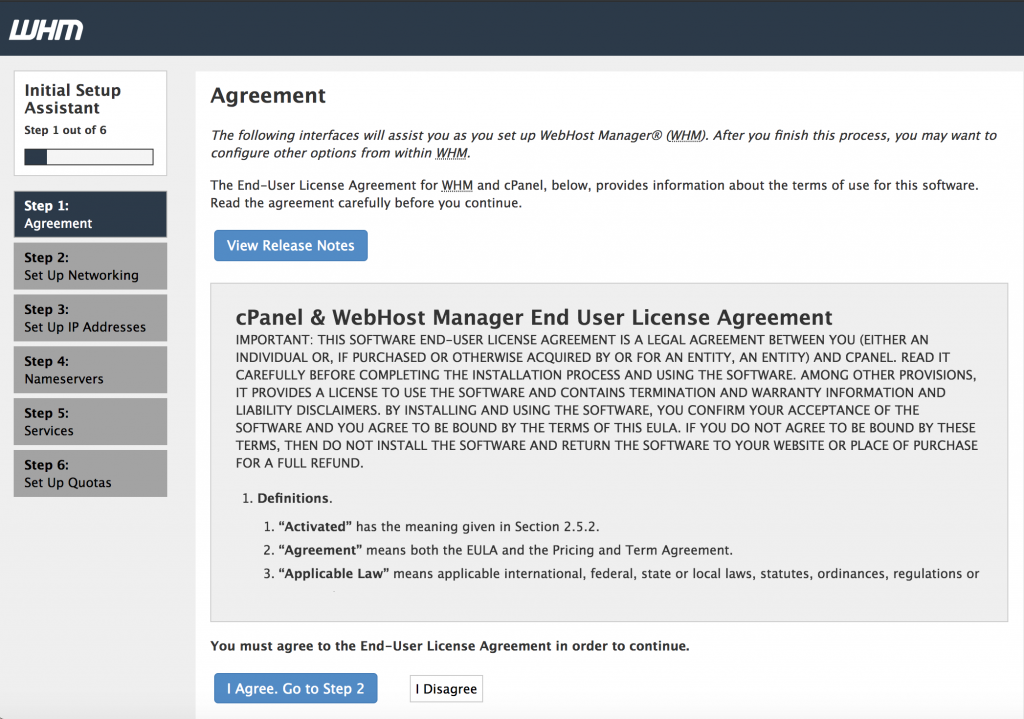
Read the End User License Agreement and accept the terms!
Step 2 – Set Up Networking
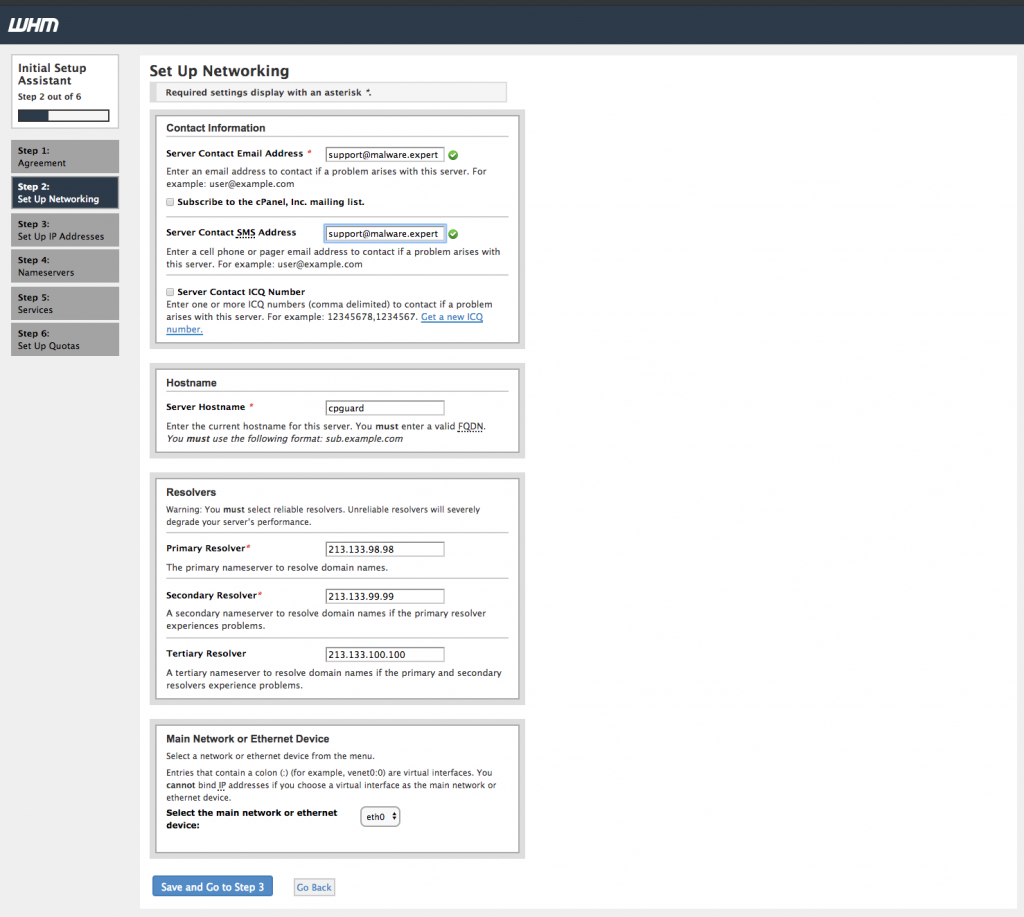
Provide your working email address in the column of “Server Contact Email Address”.
This will enable cPanel to send all important alerts, notification to this EMail-id (Recommended). You can fill the rest details as well, as required.
Step 3 – Set Up Ip Addressing
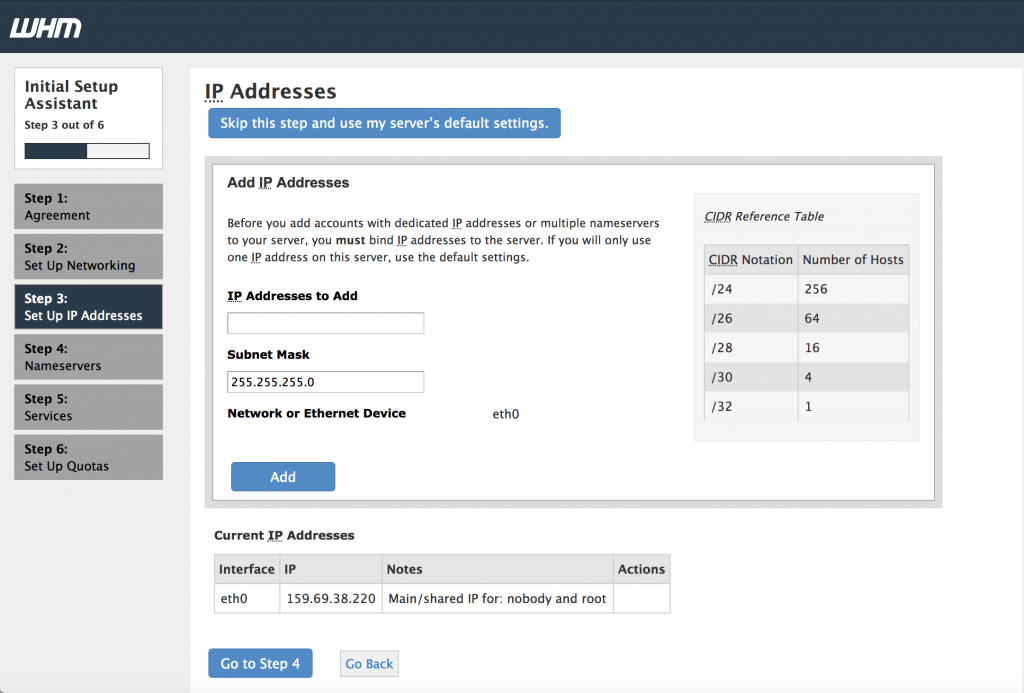
Main Network/Ethernet Device, an IP available on that device will be considered as the main IP address of your server.
Step 4 – Nameservers
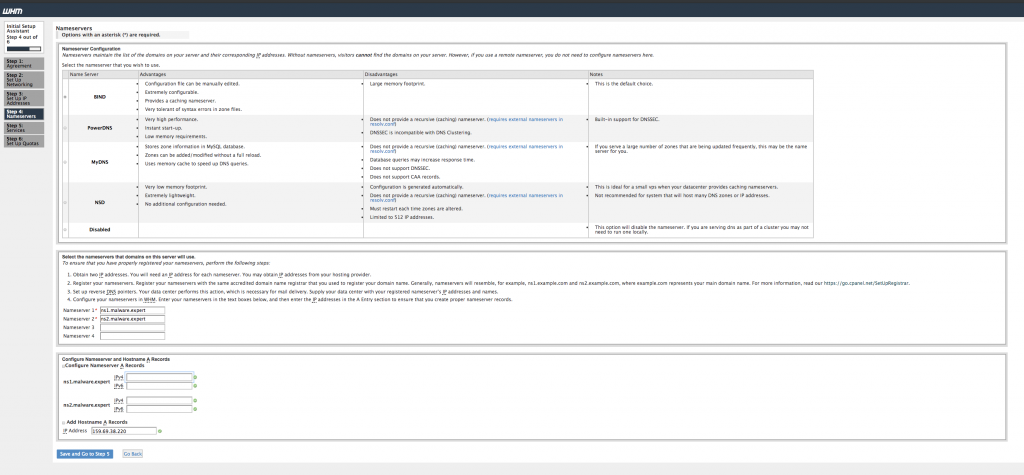
Enter a valid FQDN hostname and Resolver entries for your server in the Networking section.
Step 5 – Services
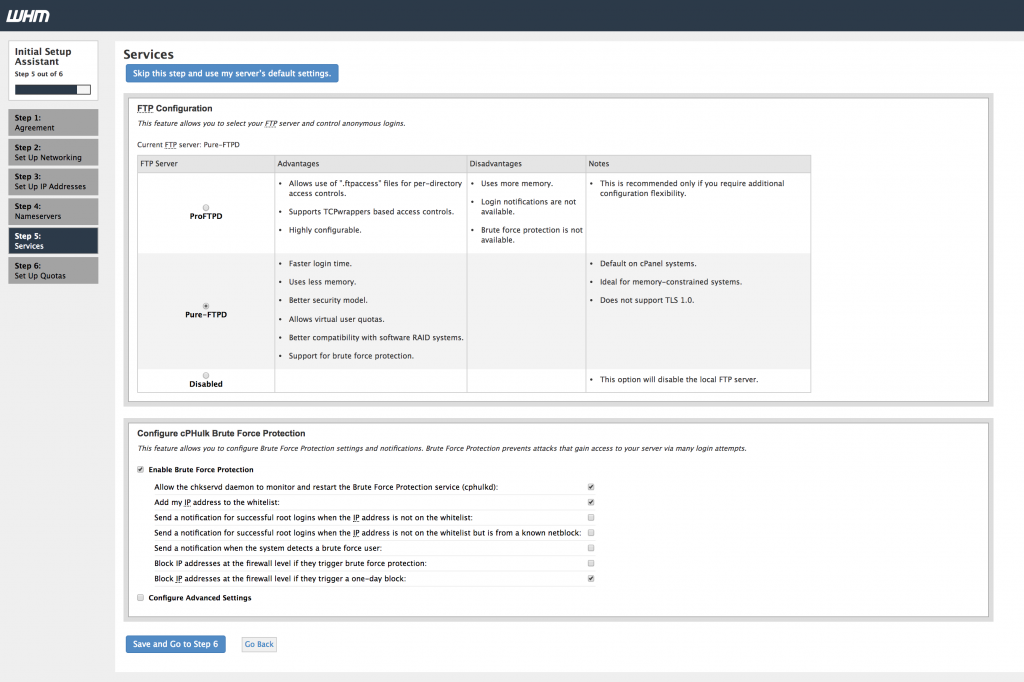
Configure different services like FTP, Mail and Cphulk.
Step 6 – Set Up Quotas
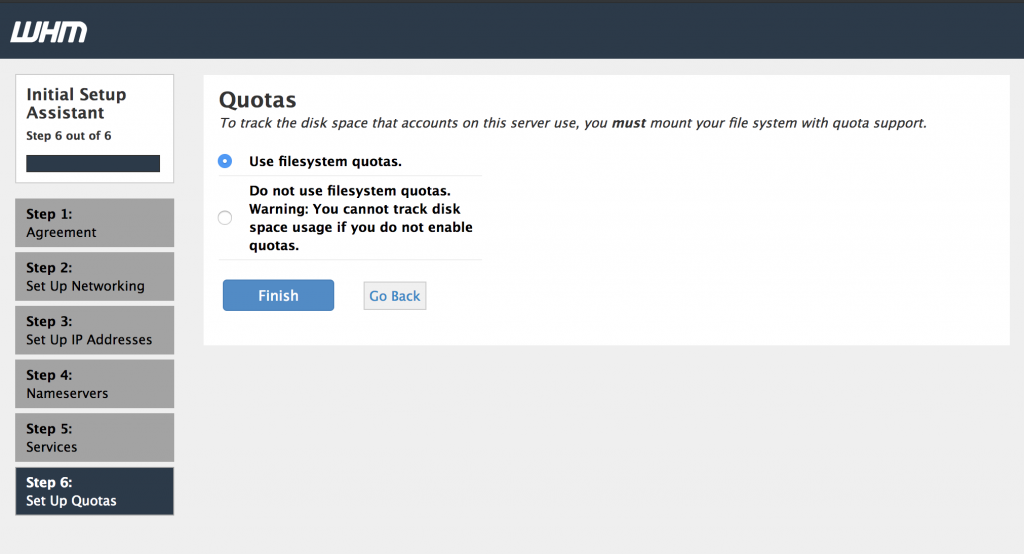
You can enable quotas which helps you to track down the disk space usages. Finish setup wizard to complete the Installation process.
cPGuard installation
Requirements
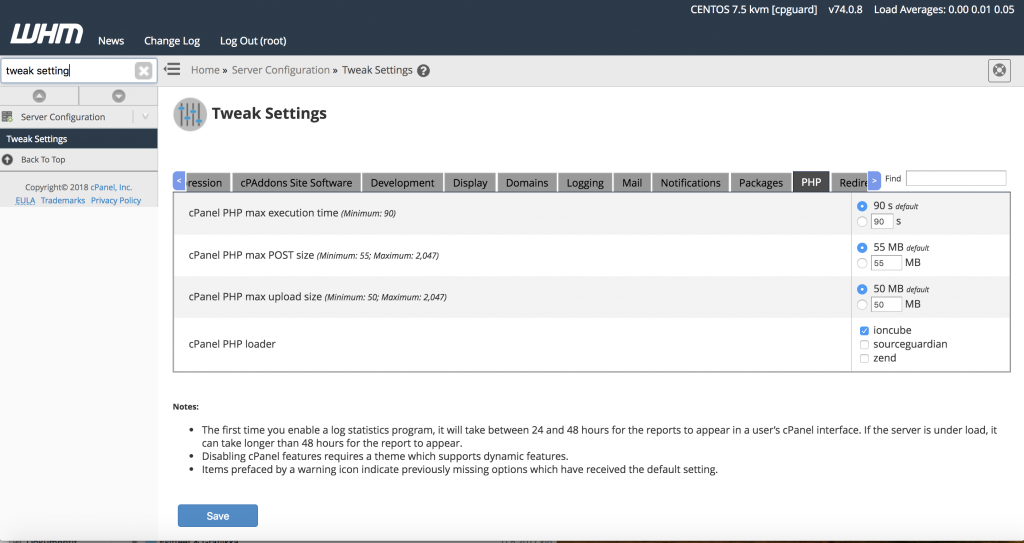
Ioncube should be enabled in cPanel’s PHP before you install cPGuard. If you have not installed it, the installer will exit with an error message.
- Login to WHM ( as root user)
- Go to Server Configuration -> Tweak Settings -> PHP
- In “cPanel PHP loader” section select ioncube check box
- Click on Save button.
This will enable Ioncube for you in 3rd party PHP binary.
Start cPGuard installation
cd /usr/local/src && wget https://downloads.opsshield.com/cpguard/cpguard.sh && bash cpguard.sh install
########################
########################
#####cPGuard manage script
#####Written and maintained by https://www.OpsShield.com
#####Please email sales@OpsShield.com for any questions regarding this software
########################
########################
    with the ionCube PHP Loader (enabled) + Intrusion Protection from ioncube24.com (unconfigured) v5.1.2, Copyright (c) 2002-2016, by ionCube Ltd.
Loaded plugins: fastestmirror, universal-hooks
Loading mirror speeds from cached hostfile
 * EA4: 85.13.201.2
 * cpanel-addons-production-feed: 85.13.201.2
 * base: mirror.ratiokontakt.de
 * extras: centos.mirrorserver.ovh
 * updates: centos.mirrorserver.ovh
Resolving Dependencies
--> Running transaction check
---> Package epel-release.noarch 0:7-11 will be installed
--> Finished Dependency Resolution

Dependencies Resolved
.
.
.
Preparing...                          ################################# [100%]
Updating / installing...
   1:cpguard-cpanel-1.90-1            ################################# [100%]
Resgistering WHM Plugin...
cPGuard registered
Resgistering cPanel Plugin...
info [install_plugin] Installing to paper_lantern
info [install_plugin] Installing cPGuard in feature manager ...
info [install_plugin] Done
info [install_plugin] Running sprite_generator
info [install_plugin] Queueing task to update API spec files
Plugin installed ok


cPGuard  installation has been completed [SUCCESS]
Please refer the initial settings documentation and apply license to complete the installation procedure
Final words
Once cPguard is installed, we need complete initial settings which allow you enable like WAF protection with ModSecurity rules and other features from cPGuard Security plugin.