Even if you still have a handy password for your account, you still want account to be as safe as possible. Two Factor Authentication gives you an additional layer of security when accessing your cPanel/WHM account. In this guide we will discuss how to setup, configure, and use two step authentication options within the Web Host Manager (WHM). The option must be enabled in WHM before it can be activated in a cPanel account.
Enabling Two factor authentication
For enabling “Two factor authentication” requires root access of the server and you must install Google Authentication app on your mobile device.
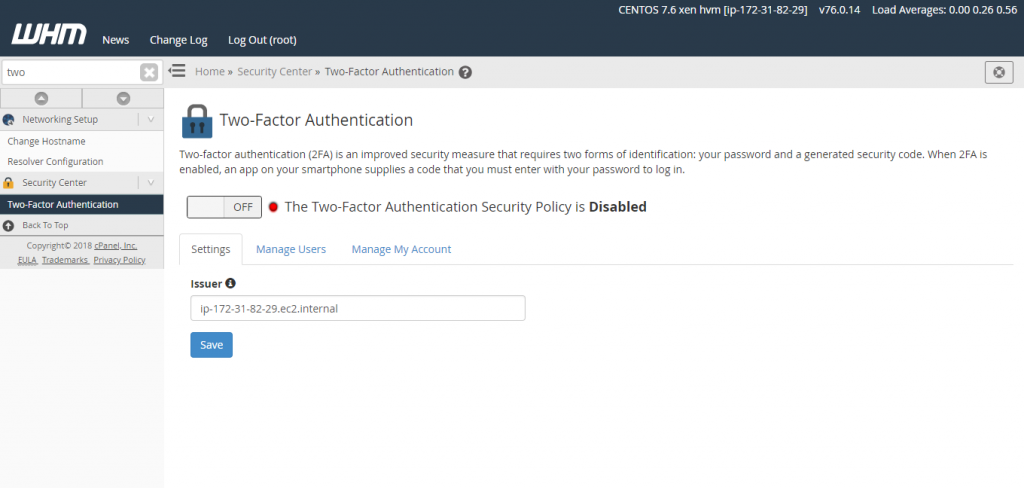
1. Log into your WHM as the root user.
2. Search for Two-Factor Authentication in the search box.
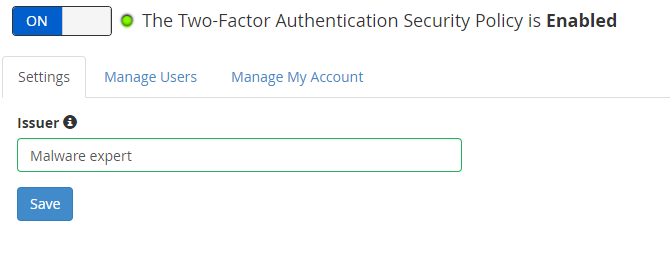
3. Click the on and off button to enable Two-Factor Authentication.
4. Next you will need to click on Settings in order to give name to the issuer for two-factor authentication. By default, it is set to your server name. This name is used to identify the code used within the Google Authenticator app. I have changed it to Malware Expert.
Enabling 2FA in WHM (root / reseller accounts)
1. Change tab from “Settings” to “Manage My Account”
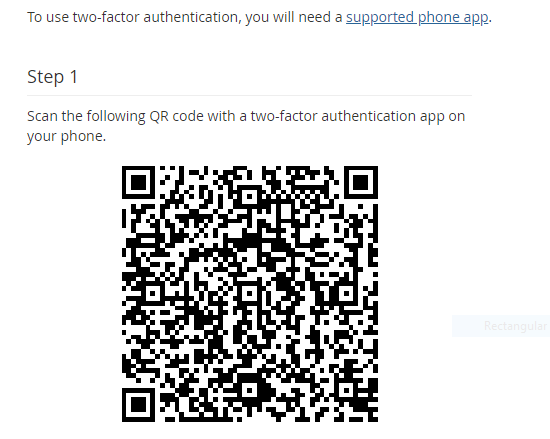
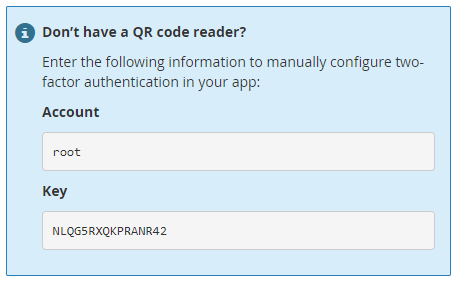
2. Click and Configure Two-Factor Authentication. If your device cannot read the QR code, then you can use the manual code provided below the QR code. Click on Manual entry in order to enter the provided key.
3. Once the account is added your phone will start generating 6 digit one-time Security Codes. You will need to enter the currently displayed code in to the Step 2 Security Code box and click ‘Configure Two-Factor
Authentication’.
4. Once the code is entered you will see a message that says “Success: Two-factor authentication is now configured on your account.”
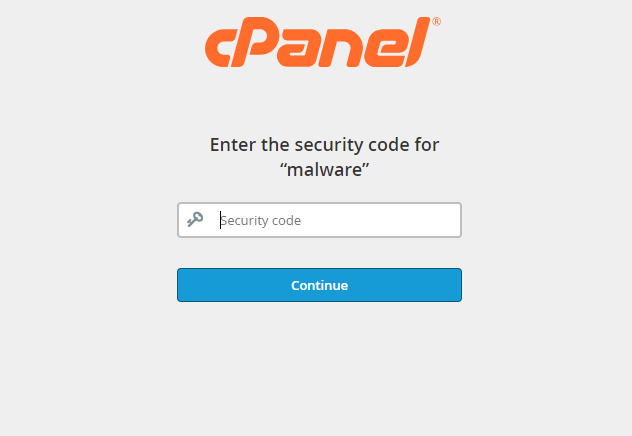
5. After you can try logout from WHM and you will be required to enter your WHM password and then use the Google authentication app to provide the code to login cPanel as per the screenshot below.
Enabling 2FA in cPanel (User accounts)
In order to enable two-factor authentication on a cPanel account, you will need to login and perform the following steps.
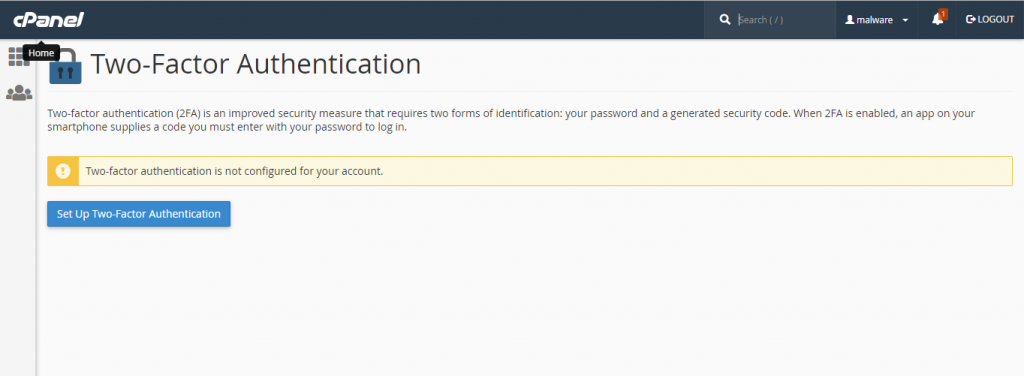
1. Click on the Two-Factor Authentication icon in cPanel.
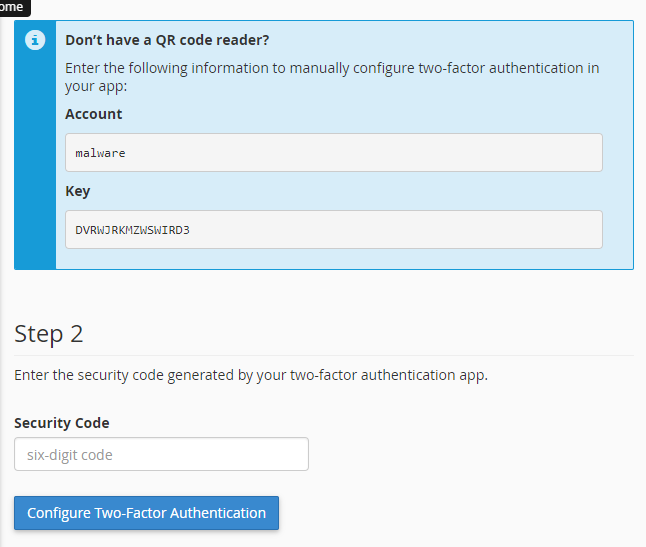
2. Click and Configure Two-Factor Authentication. If your device cannot read the QR code, then you can use the manual code provided below the QR code. Click on Manual entry in order to enter the provided key.
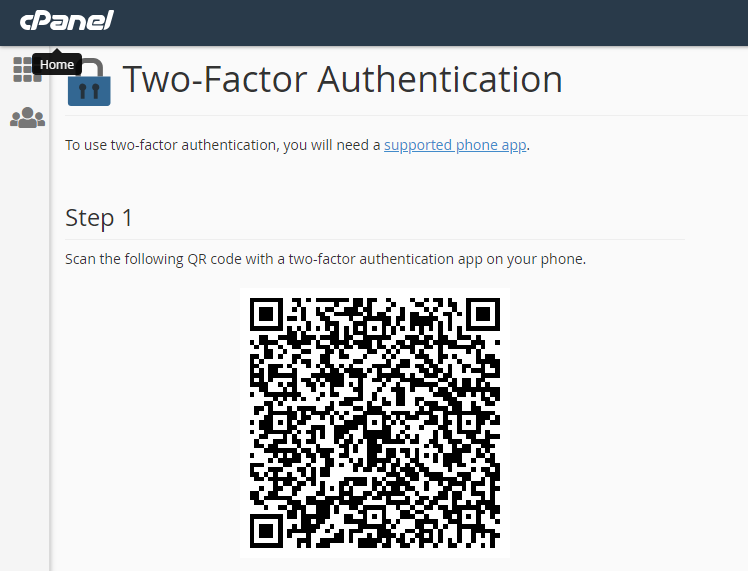
3. You can scan the QR code with your mobile device
4. Once you scan the QR code you will get a code that will only show for a short period of time. Go down the screen to Step 2 and type in the 6-digit code.
Once the code is entered you will see a message that says “Success: Two-factor authentication is now configured on your account.”
After you can try logout from cPanel and you will be required to enter your normal cPanel password and then use the Google authentication app to provide the code to login cPanel as per the screenshot below.

